Now that you have the basic idea sketches of the design you will be developing, let's get started.
In this step you will establish
the "footprint" of the building.
What shape will it look like from the top?
What polygons will you use to make the pieces of your building.
Try to keep it relatively simple, because you will be making nets,
(flat patterns to be folded into the three
dimensional surfaces) from your elevation drawings. Nets are always
easier to create for regular polyhedral surfaces.
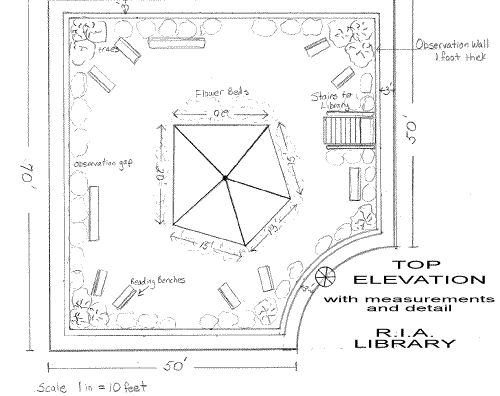
The top elevation is a "birdseye" view of your building. It is usually quite simple and includes measurements. It will be just a perimeter drawing unless you have some extra stuff growing on your roof like we do. Our roof has a four foot high and one foot thick observation wall, a pentagonal, glass, pyramid, and lots of plants and benches.
*Note that we include the scale (1 inch = 10 feet) on all of our drawings. You need to be sure to include the scale you are using.

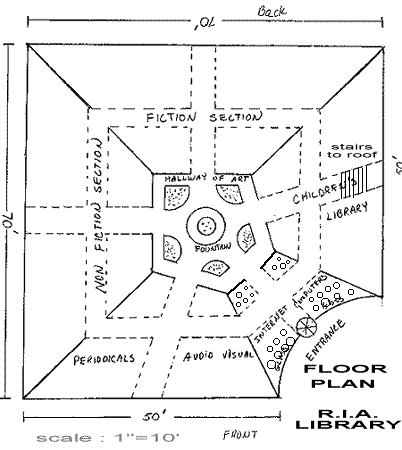
Our building footprint is actually just a square with one corner cut off in an arc. We plan to construct the square in five pieces. This is much more clearly seen in the floor plan below. Your floor plan shows doorways, hallways, furniture etc.. It should be quite detailed and include measurements and your scale as well. You will be constructing your nets from these measurements, so use your ruler VERY carefully.

